Both the drogue and main chutes are connected to the rocket body tubes by two shock cords.
This means that we can distribute the shock loads into two parts, hence the load on each bulkhead will be lower than the total shock load calculated from Estimating loads on shock cords .
The body tube is split into three parts (see Recovery system changes ), however in this shock load distribution calculation we assumed the mass of the middle part of the body tube is negligible, hence calculated as if the body is split into two.
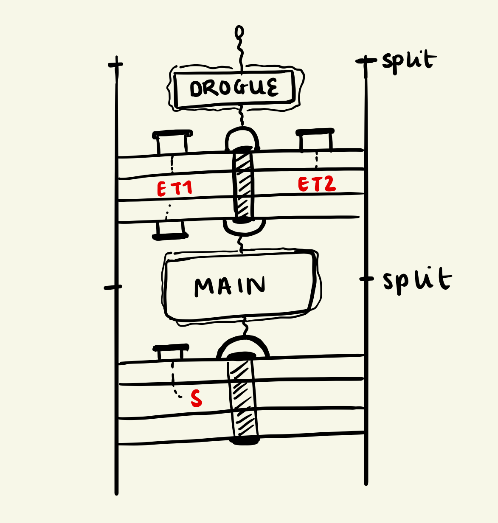
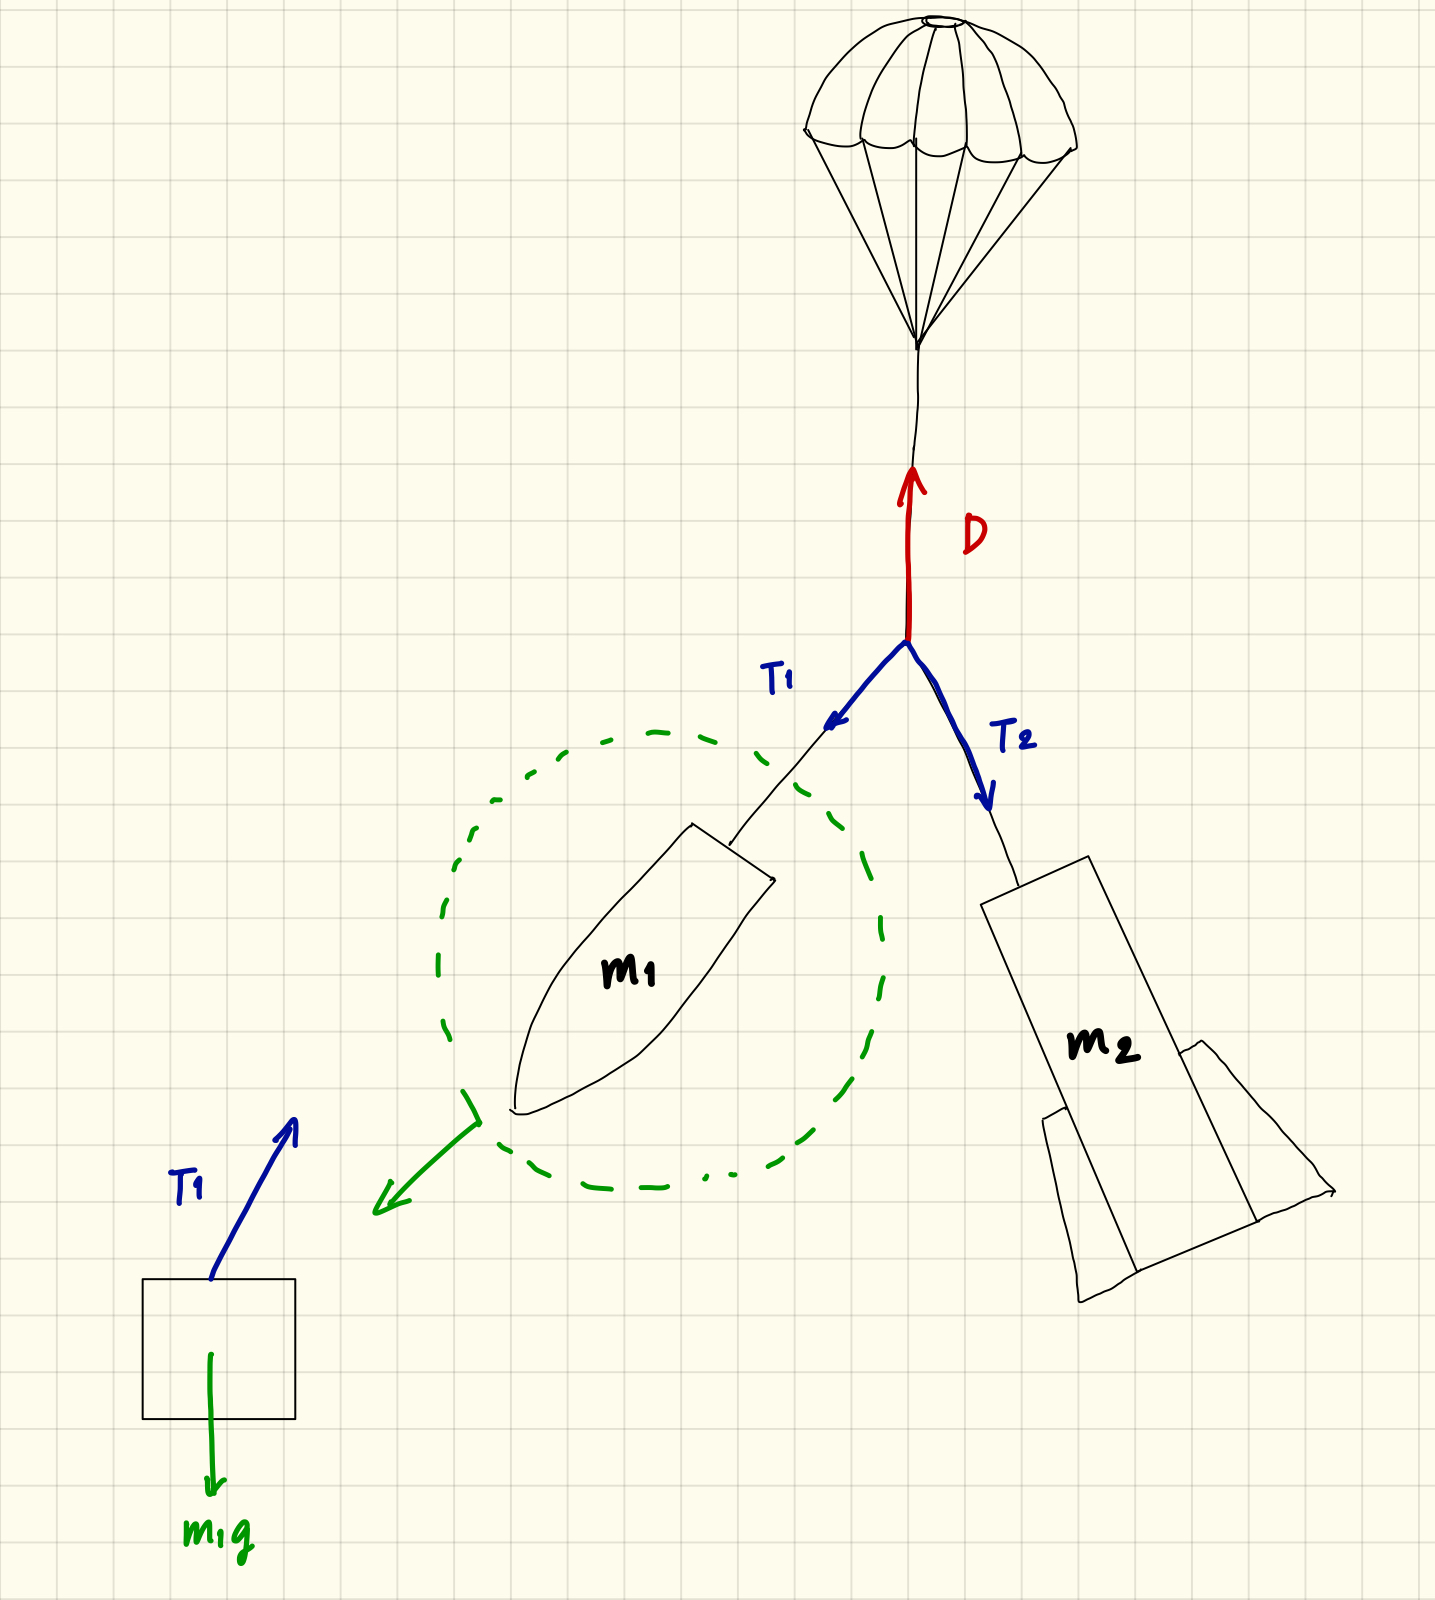
Looking at the diagram above, the upper body tube has a mass of m1 (8.5kg), and lower with a mass of m2 (21kg).
The rocket is accelerating downwards at a(m/s^2).
The drag D from the parachute is the shock load, and these are divided into tension forces T1 and T2.
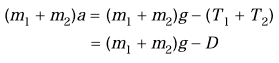
Hence,
![]()
Analysing the upper body tube (in the green dotted circle), as the rocket is accelerating downwards at a(m/s^2) we obtain an expression
![]() (1)
(1)
Extending the analysis to the lower body tube and combining the equations,
We will get an expression for the acceleration a:
![]()
Substituting this expression into equation (1),
![]()
This allow us to obtain an expression for T1
![]()
This means that the shock load on each bulkhead depends on the mass ratio of the upper and lower body tube only.
Hence,
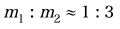
so
![]()
===
Upon further analysis, we have decided that the short coupler section should be considered separately despite its small size because the loads on the bulkhead either side is by no means negligible, and we have to size the bulkheads with the loads.
The situation has now become a three-body problem, with two different and separate drag forces (Dm and Dd) on the (main and drogue) chutes, and three masses (M1 - nose cone, M2 - connector, M3 - rest of the rocket) connected by shock cords (tensions denoted T1-4). The slanted shock cords are exaggerated - the actual situation would be much closer to vertical.
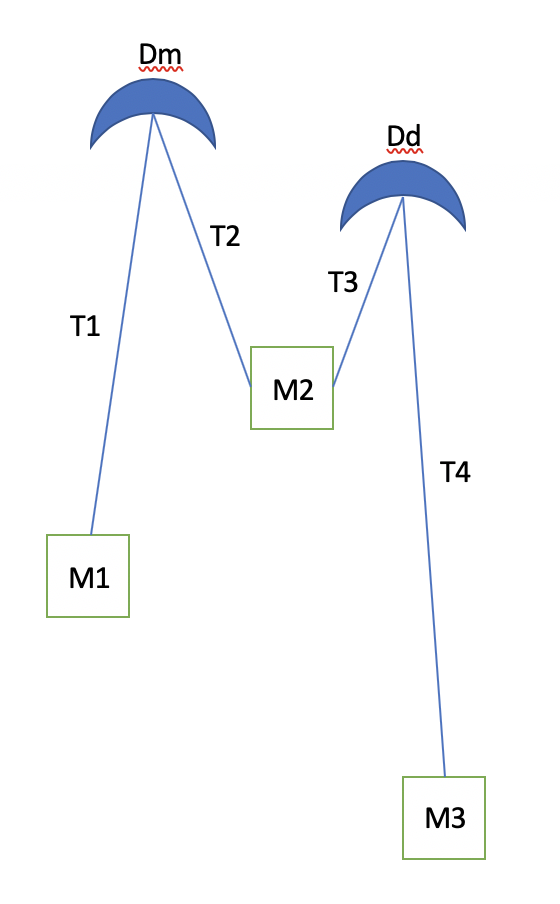
Assume all lines are taut and the system has a common acceleration a, and hence by
Dm+Dd-(M1+M2+M3)g=(M1+M2+M3)a,
a=(Dm+Dd)/(M1+M2+M3)-g
For M1,
T1-M1g=M1a,
for M2,
T2+T3-M2g=M2a
and for M3,
T4-M4g=M4a.
At the parachutes,
Dm=T1+T2,
Dd=T3+T4
Solving for T1-4 in terms of Dm and Dd,
T1=M1(Dm+Dd)/(M1+M2+M3)
T2=((M2+M3)Dm-M1(Dd))/(M1+M2+M3)
T3=((-M3)Dm+(M1+M2)Dd)/(M1+M2+M3)
T4=M3(Dm+Dd)/(M1+M2+M3)
The tension in the four cords are solved for analytically as above, and we can recognise T3, if we assume M3 >> m1+m2 and Dm >> Dd, would be negative. That means the chord can not be taut, and we instead have a situation like below,
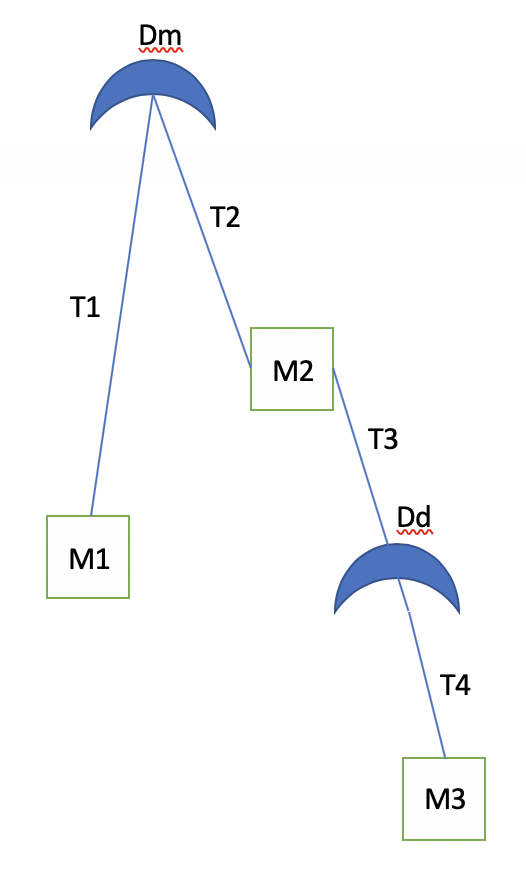
For M2 the equation becomes
T2-T3-M2g=M2a
and at Dd,
T3+Dd=T4
The other equations are unchanged.
Solving for T1-4 in terms of Dd and Dm,
T1=M1(Dm+Dd)/(M1+M2+M3)
T2=((M2+M3)Dm-M1(Dd))/(M1+M2+M3)
T3=(M3(Dm)-(M1+M2)Dd)/(M1+M2+M3)
T4=M3(Dm+Dd)/(M1+M2+M3)
Given our assumptions above, T3 is now positive and taut again.
For estimating the worst case loading at the bulkheads, bearing in mind the drogue chute is not expected to give drag after main chute deployment, and hence worst case for T1,4 would be when drogue chute also generates lift (Dd>0), and for T2,3 would be when drogue chute does not generate lift (Dd=0).
For example:
Dm=6kN, Dd=2kN, M1=(maximum 2Kg), M2=0.241Kg(Valispace), M3=~35Kg
Check if T3 is taut in scenario one:
T3=-5.52kN
Hence T3 isn't taut, change to scenario two.
The bulkheads (and potentially shock cords) have to be sized to the below loads:
T1=0.430kN
T2=5.68kN
T3=5.64kN
T4=7.51kN
Huge force on the main rocket bulkhead! Considerable load on the transition bulkhead too, considering its light weight.
Do note the above scenario assumes steady state drag from the parachutes, so we would have to tack on extra safety factor (around 1.5-2?) for the loads.